Vibefam lets you create and send marketing emails to your members directly, such as promotions, announcements and re-engagement campaigns. Describe the email in a line or two and the editor writes and designs it with your studio's photos, classes and brand colour, or build it by hand in the classic drag-and-drop editor. You can target recipients precisely, save designs as reusable templates, and track how each campaign performed.
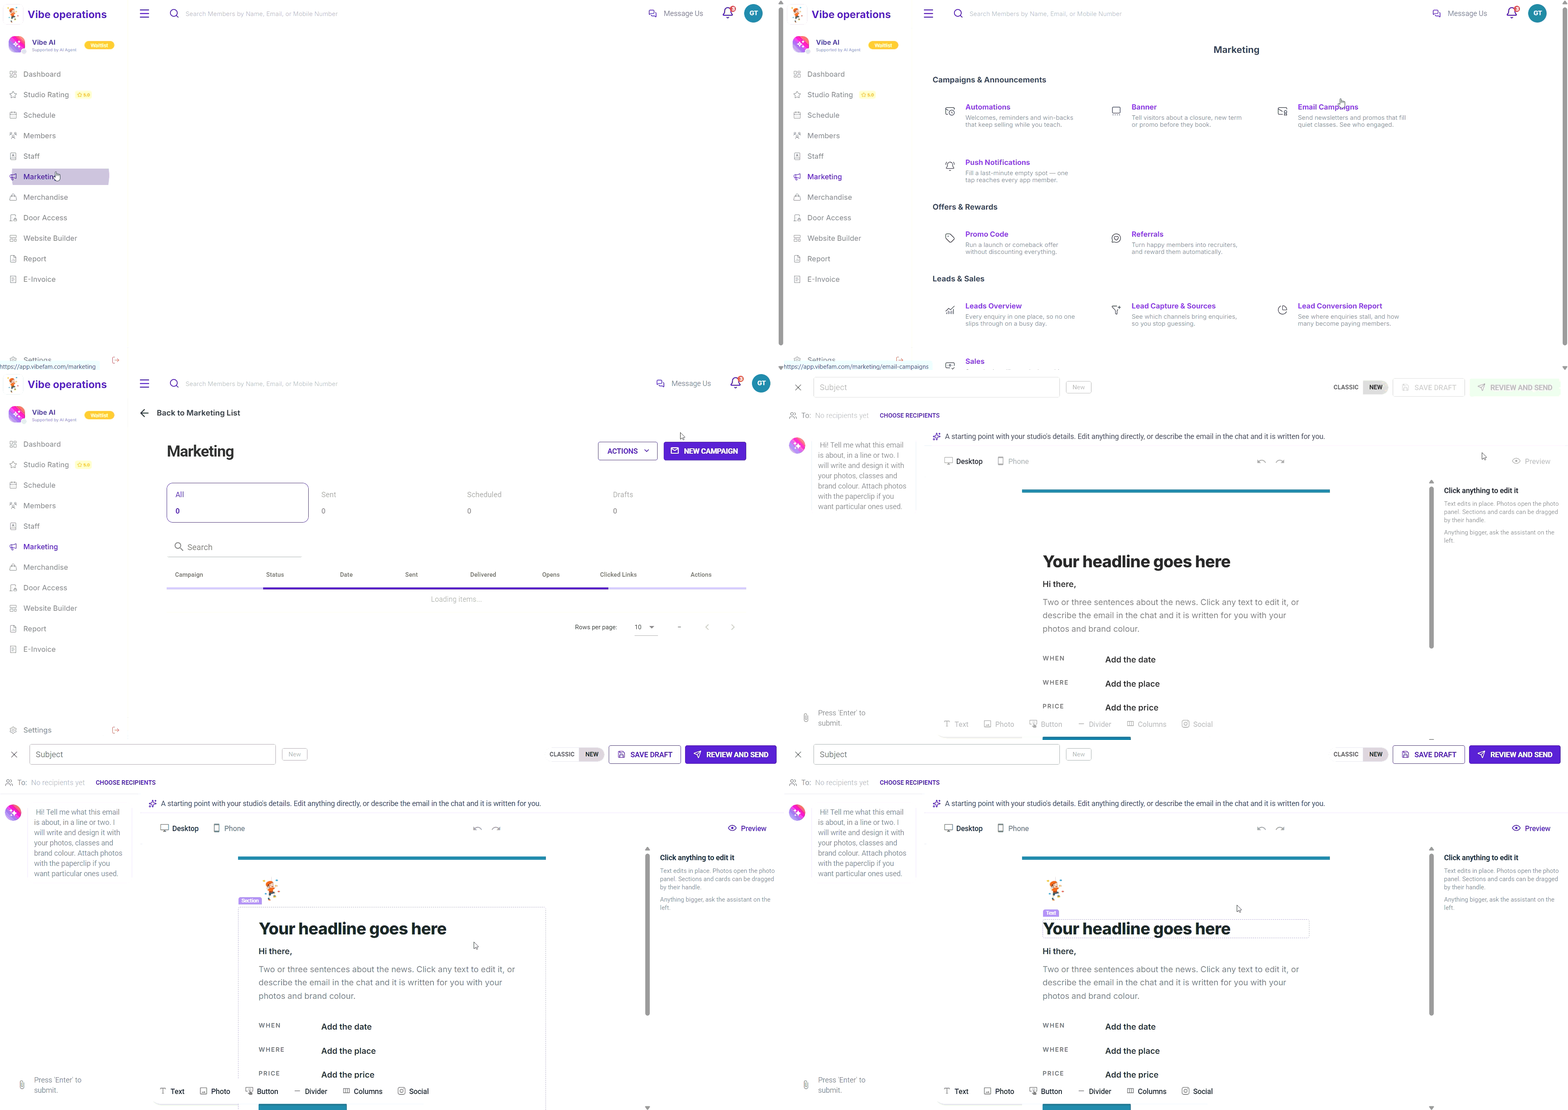
Navigate to Marketing → Email Campaigns.
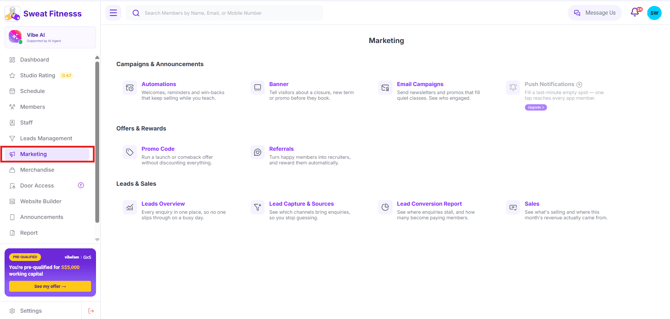
What does the Marketing dashboard show?
The Email Campaigns page lists all your campaigns. Along the top, cards summarise them by status (All, Sent, Scheduled and Drafts) so you can see at a glance what's gone out, what's queued and what's still in progress.
Each campaign row shows its performance once sent:
| Column | What it tells you |
|---|---|
| Status | Draft, Scheduled, or Sent |
| Date | When it was (or will be) sent |
| Sent | How many recipients it went to |
| Delivered | How many were successfully delivered |
| Opens | How many recipients opened it |
| Clicked Links | How many clicked a link inside |
Use the Actions icons on each row to view, edit, or delete a campaign. Opens and Clicked Links are how you tell what's working: a low open rate usually points to the subject line, while low clicks point to the content or offer.
Draft campaigns stay in the list until you send or delete them, so it's normal to see a mix of Drafts and Sent campaigns here.
Creating a campaign
Step 1: Start a new campaign
Click New Campaign in the top right. The editor opens with New selected in the Classic | New toggle at the top right. There's nothing to switch on. The editor works best on a computer.
Step 2: Describe your email
In the chat panel on the left, tell the assistant what the email is about in a line or two, then press Enter. For example:
- Invite members to our Christmas party on 20 December at 6pm
- 20% off all class packs this weekend
To use particular photos, attach them with the paperclip icon before you send. While the email is being written you'll see Making a little magic. Please give us a few minutes… The assistant then fills in the Subject and writes and lays out the email using your studio's details, such as your logo, brand colour, photos and classes.
Step 3: Read the assistant's reply
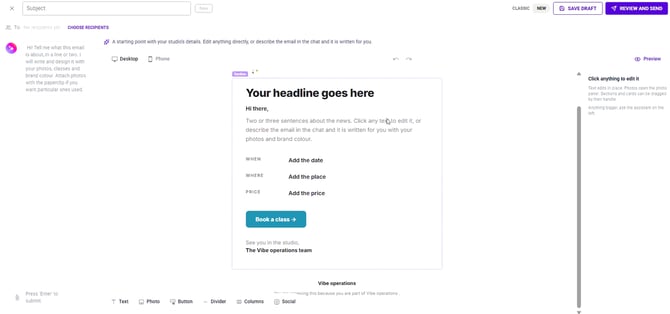
The assistant's reply summarises what it wrote. It also lists anything you should check before sending, and names any details it left out because you didn't give them, such as dates or session times. Add those details yourself, or tell the assistant and it will update the email.
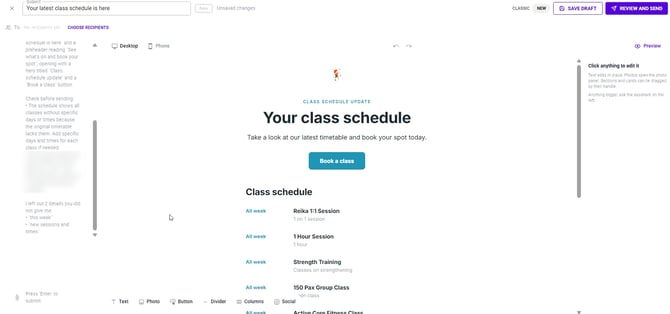
Step 4: Make changes
You can edit the email by hand, ask the assistant, or mix both.
- Edit text: click any text to edit it in place. A toolbar appears for bold, italic, underline, text size (S, M, L, XL), font, text colour, highlight, links and alignment.
- Change a photo: click a photo to open Choose a photo. Pick one from your library, or click Upload Photos (JPEG, PNG or HEIC, under 10 MB each).
- Adjust a section: click a section to see its settings on the right: background colour, background photo, the photos in that section, Swap Columns, Move Up, Move Down, Duplicate and Delete. You can also drag a section by the handle at its top right.
- Add blocks: use the bar below the email to add Text, Photo, Button, Divider, Columns or Social links.
- Ask the assistant: type the change in the chat, for example Start the party at 5pm instead of 6pm.
Use the undo and redo arrows above the email to step back through changes.
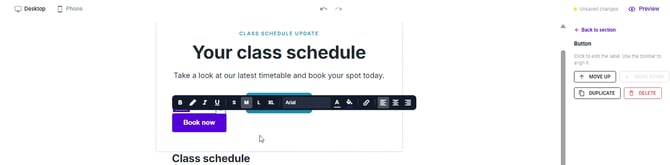
Step 5: Check desktop and phone
Switch between Desktop and Phone above the email to see both layouts. Click Preview to see the email as recipients will, including unsaved changes. You can switch between Desktop and Phone in the preview too.
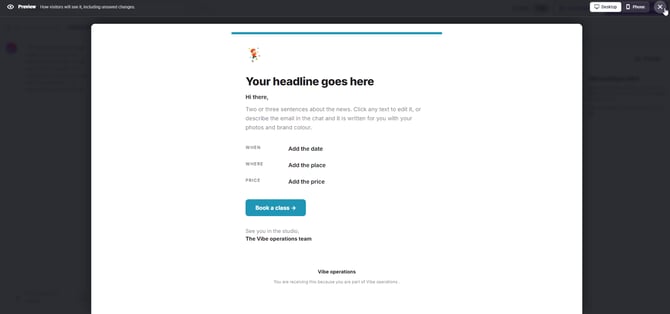
Step 6: Save or send
- Save Draft: save the campaign to finish later. It appears as a Draft on the Email Campaigns page.
- Choose Recipients (next to To:, under the subject): pick who will receive the email.
- Review and Send: check the email and send it.
Choosing recipients and sending
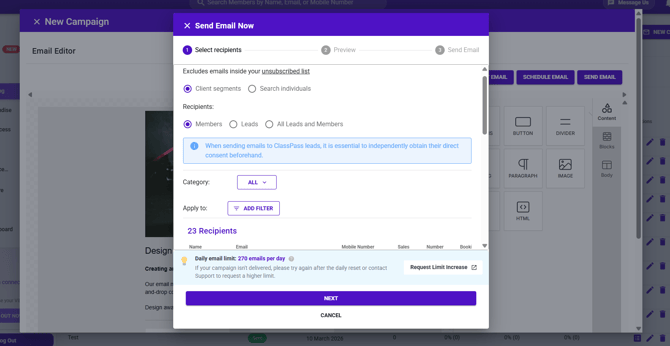
When you click Review and Send, a three-step flow opens: Select recipients → Preview → Send.
Who to send to
Pick a recipient type:
- Members
- Leads
- All Leads and Members
How do you filter recipients to a segment?
You can send to everyone in that group, or narrow down:
- Category: quick segments such as All, Active, Inactive, and Expired (customers whose packages have expired).
- Add Filter: build a precise condition, then click Apply. Filters can target behaviour and status over a time window, for example:
- Bookings is equal to 0 in the last 14 days, to re-engage members who've gone quiet
- Members whose status is Expired in the last 7 days, to win back recent lapses
As you adjust the category and filters, the recipient count and preview list update live, so you always see exactly who will receive the email before sending.
Unsubscribes are handled for you. The send automatically excludes anyone on your unsubscribed list, so you don't need to manage opt-outs manually.
Click Next when your audience is right, review the email in Preview, then Send.
Is there a daily email sending limit?
There's a daily send limit on marketing emails. The exact number depends on your plan and is shown in-app when you go to send. If a campaign to a large list isn't fully delivered, it may have hit the daily cap.
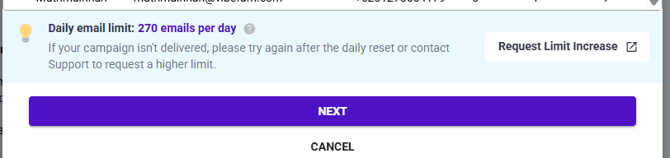
- Try again after the daily reset, or
- Use the Request Limit Increase link in the send flow to ask Support for a higher limit.
If you're planning a large send, it's worth checking your limit against your list size ahead of time.
Prefer to design by hand? Use the classic editor
Switch to the classic drag-and-drop editor with the Classic | New toggle at the top right of the editor. You'll be asked to confirm, and unsaved changes are lost when you switch, so click Save Draft first.
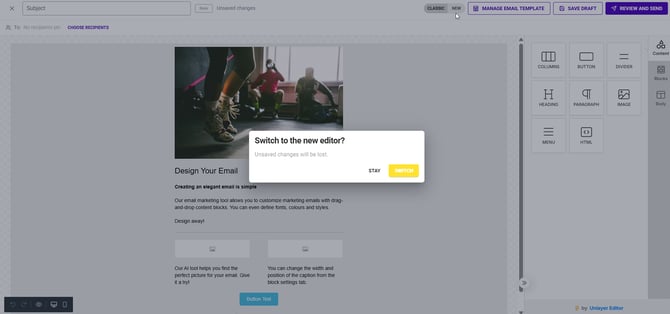
In the classic editor, drag content blocks from the right-hand panel onto your email:
- Columns, Button, Divider, Heading, Paragraph, Image, Menu, and HTML for custom code
- Adjust fonts, colours, and styles per block from the block settings
- Preview your design, and switch between desktop and mobile views, using the controls at the bottom left of the canvas
Across the top of the classic editor you have three actions:
- Manage Email Template: save this design as a reusable template, or load a saved one
- Save Draft: save the campaign to finish later
- Review and Send: choose recipients and send
How do I reuse designs with email templates?
If you send similar emails regularly, such as a monthly newsletter or recurring promotions, save the design as a template with Manage Email Template in the classic editor. Next time, load the saved template instead of designing from scratch.
You can also reach your saved templates from the Email Campaigns page: click Actions → Email Templates.
Note: Emails created by the New AI prompt cannot be save as an email template currently.
Before you send
- Go through everything the assistant listed under Check before sending. It writes from your studio details and your prompt, so confirm dates, times, prices and class names are correct
- Send yourself a test and read it as a member would, on mobile as well as desktop (the Phone view and Preview help, but a real inbox is the true check)
- Double-check the recipient filter (Active vs. Inactive vs. All) before launching, since a campaign can't be unsent
- Make sure the offer or message matches the audience you've selected
- After sending, check Opens and Clicked Links on the Email Campaigns page to learn what resonates
- Keep marketing sends purposeful; frequent, untargeted emails lead to members tuning out or unsubscribing