
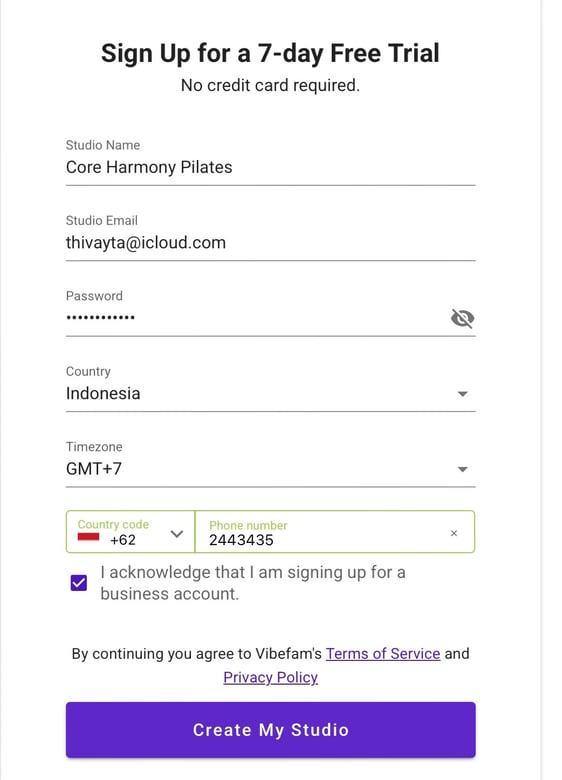
Step 1: Sign Up to Vibefam
-
Fill in your detail as below
- Studio Name
- Studio Email
- Password & Contact number -
Click on "Create My Studio" 🏋️
Step 2: Access the Xendit set up
-
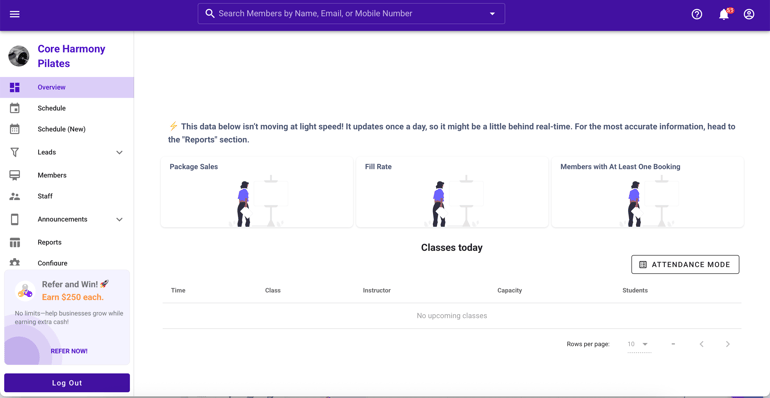
After successful login, you will be able to view the main dashboard.
-
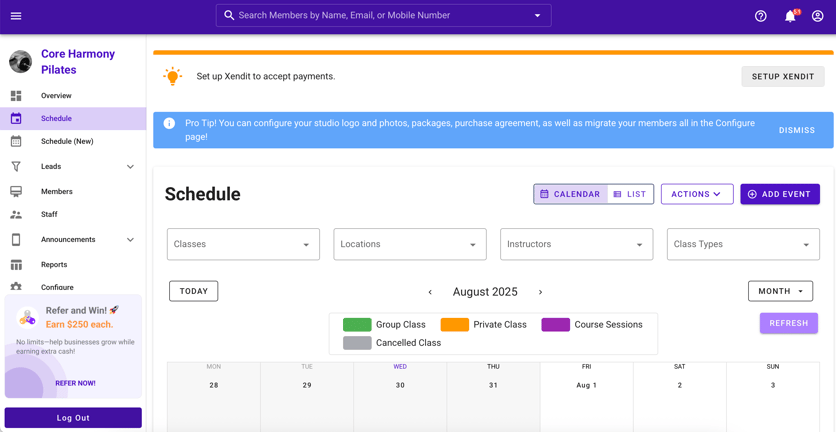
Click on the Schedule at the left side bar.
-
Select the "SET UP XENDIT" option at the top of the page.
You will then prompted to input your email address *It's recommended to use the same studio email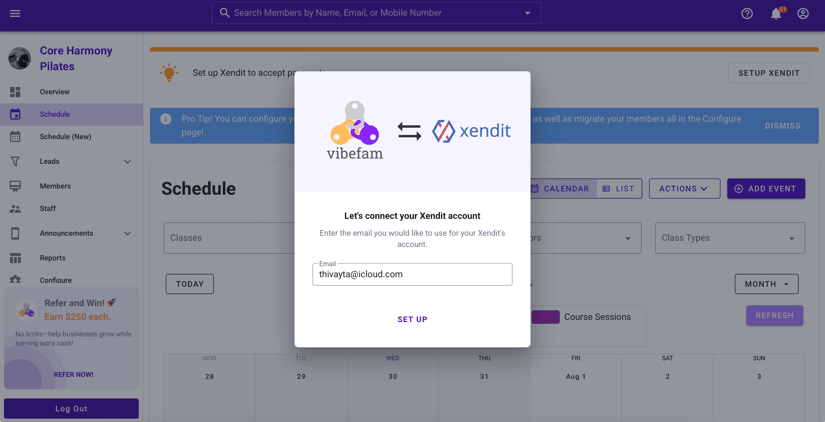
-
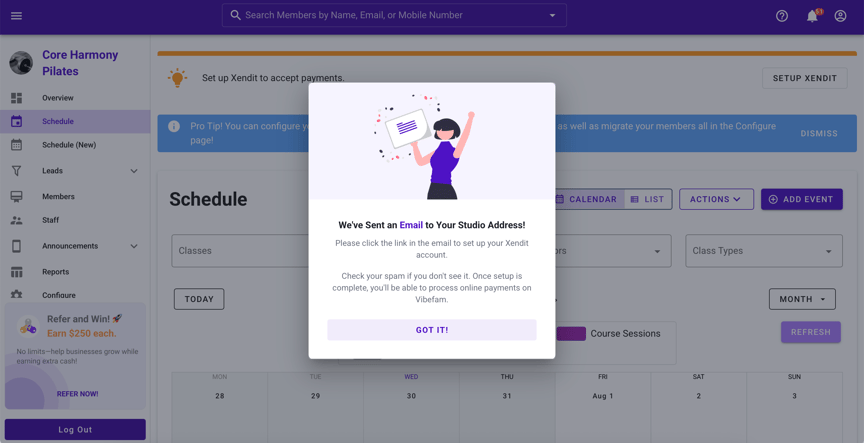
A Pop-up will appear confirming: "We've sent an email to your studio address"
Step 3: Create Your Xendit Account
-
You may now access to your inbox and look for the subject" Account Creation Invitation Xendit"
-
Click on "Create Account" which directs you to Xendit Creation Page.
- This is the Xendit Creation Page whereby you are required to fill up the necessary details:


- Business Name (Studio Name)
- Email (use the same email address as sign up)
- Create Password

4. You will then receive a verification code in your inbox. Enter this code to complete the verification process.


Step 5: Final Step to access Xendit
-
After entering the verification code, you’ll be redirected to the Xendit setup page. Fill in your studio location and complete any other required details to finalize the setup.

2. Once completed, you’ll land on the Xendit Dashboard.

🎉 Almost There! Xendit Successfully Linked to Vibefam!
*Before you can start collecting payments from your members, there are just a few more important steps to
complete in your Xendit dashboard
✅ What’s Next?
1. Submit Your Business Documents for Approval:
➡️ Go to your Xendit Dashboard
➡️ Upload all required documents (e.g., business registration, director ID)
➡️ Xendit will review and approve your account within 1–3 business days
⚠️ Note: If there are any issues with your documents, the Xendit team will email you directly with instructions.
2. Activate Your Preferred Payment Channels:
➡️ Click on “Payment Channels” in your Xendit Dashboard.
➡️ Enable channels like Credit/Debit Cards, FPX, E-Wallets, etc.
➡️ Some channels (like Cards) may require additional KYC documents
⚠️ Note: Most studios use cards for recurring packages — so make sure this is set up to avoid payment issues later.
3. 👉 Click the link here to view a Google Sheet with:
➡️ All supported payment methods
➡️ Fees per method
➡️ Whether it supports recurring packages
➡️ Payout timelines to your bank account
How to Set Up Xendit for Recurring Packages in Vibefam
Follow this simple guide to integrate Xendit with your Vibefam account so recurring package payments are secure.
Prerequisites
-
You have an active Vibefam studio account.
- Your Xendit account is set up and ready to accept payments.
Self-Service Onboarding (Mobile)
- Access to the Xendit Page by clicking on this link
- Once logged in, tap the three horizontal lines (menu) at the top
- Click on the settings
- Scroll down and click on Webhooks
- Scroll down further to find Payment Session Completed
- Enter this Webhook URL: https://api.vibefam.com/xenditWebhooks/session in the Payment Session and click on Test and Save, and you're done.


Self-Service Onboarding (Desktop)
- Repeat the steps above by accessing the Xendit page.
- Go to the bottom-left and click Settings.
- You will see an option called 'Developers'. Under the Developers, click on Webhooks.
-
Scroll down to “Payment Session Completed” and set the URL: https://api.vibefam.com/xenditWebhooks/session.
Click on Test and Save, and you're done.


