
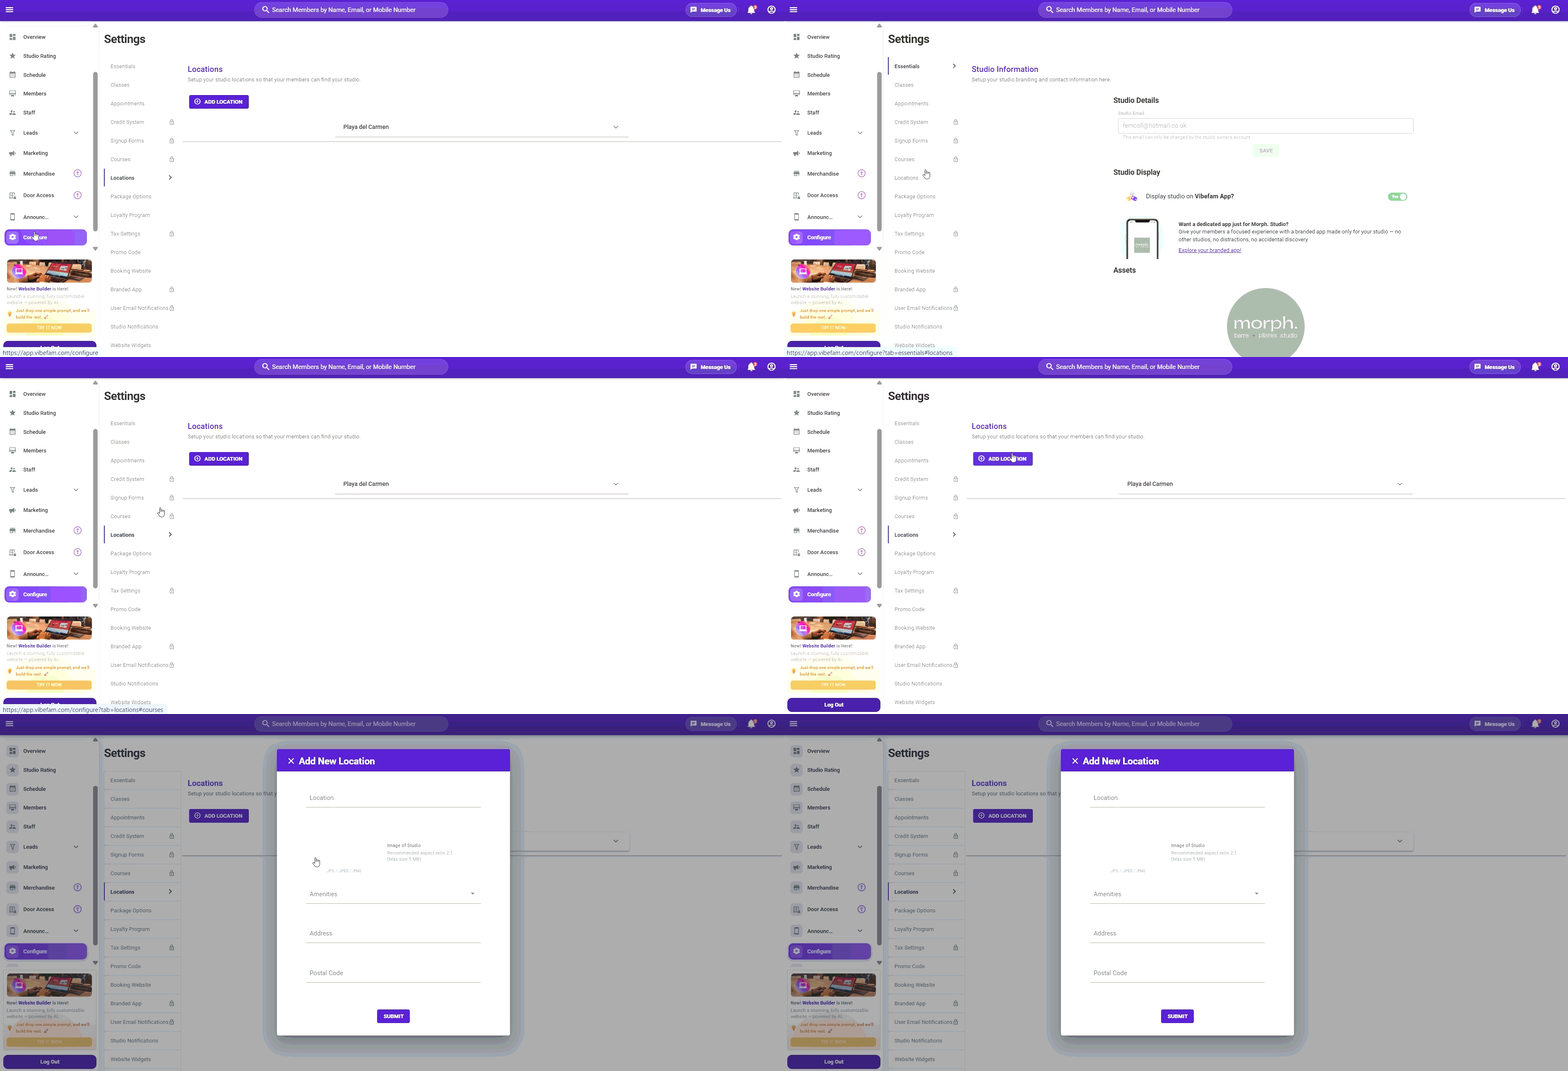
To add a location, navigate to the Locations tab, edit the default Orchard location with your venue details, and click Submit. Locations are the venues where you run your classes — every class and course must be assigned to one, so set these up before building your schedule.
- Navigate to the Locations tab.
- Select the default Orchard location to edit it — updating this existing entry is faster than creating a new one from scratch.
- Enter a Location name — a short label your members will recognise, e.g. the building or neighbourhood name.
- Upload an image of your studio space.
- Select the amenities available at this location (optional).
- Enter the full address and postal code. This is what members see on your booking website and in booking confirmations, so make sure it's exact.
- Click Submit to save your changes.
How many locations can I add?
The number of locations included depends on your current plan. If you operate more venues than your plan allows, additional locations may be available as a paid add-on — contact our support team to learn about adding locations to your plan.
How do I add a second location?
Once you have saved your first location, you can add a second venue by following these steps:
- Navigate to the Locations tab.
- Click Add Location.
- Complete the same fields described above — location name, image, amenities, and full address — then click Submit.
Can I restrict a package to specific locations?
Yes. If a package should only be redeemable at certain venues, open the package, go to Package Options, and select Package Restrictions.