
The Appointment System lets you offer and manage 1-to-1 sessions alongside your group classes — personal training, physiotherapy, massage, consultations, beauty treatments, and anything else that's booked individually rather than as a group.
Members book appointments based on your real-time availability, so there's no manual back-and-forth to coordinate times.
- What is the Appointment System?
- How It Works — User Booking Flow
- How to Set It Up
- Viewing appointment availability
- Showing appointments on your booking site
- Which studios is this for?
- Before you go live
Where appointments appear: the appointment booking tab is available on your booking website and branded app only.
💡What is the Appointment System?
Not all services thrive on group sessions — some shine through personalized, one-on-one attention.
Think personal training, physiotherapy, massage therapy, or consultations.
With Appointment Booking, your studio can now:
- Open new revenue streams by offering private 1:1 sessions alongside group classes.
- Fill your trainers’ schedules smarter — members book based on real-time availability, no more manual coordination.
- Deliver a premium client experience with dedicated, personal sessions that keep members coming back.
🗓️ How It Works — User Booking Flow
Your members can now book 1:1 sessions through a new Appointment Tab on your booking website. (ℹ️Note: This is only available on the booking website & branded app)
Step 1: Enter the booking website/branded app
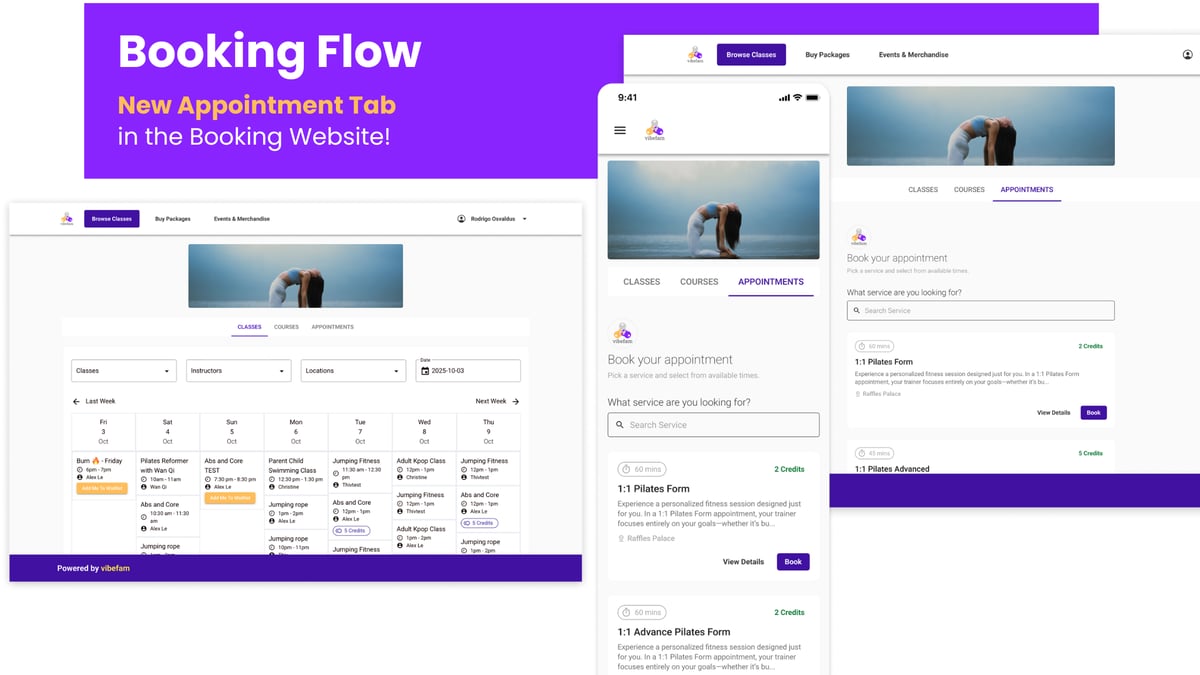 Step 2: Users can select the service or appointments.
- Select their preferred service
- Choose a location, instructor, date, and time
-
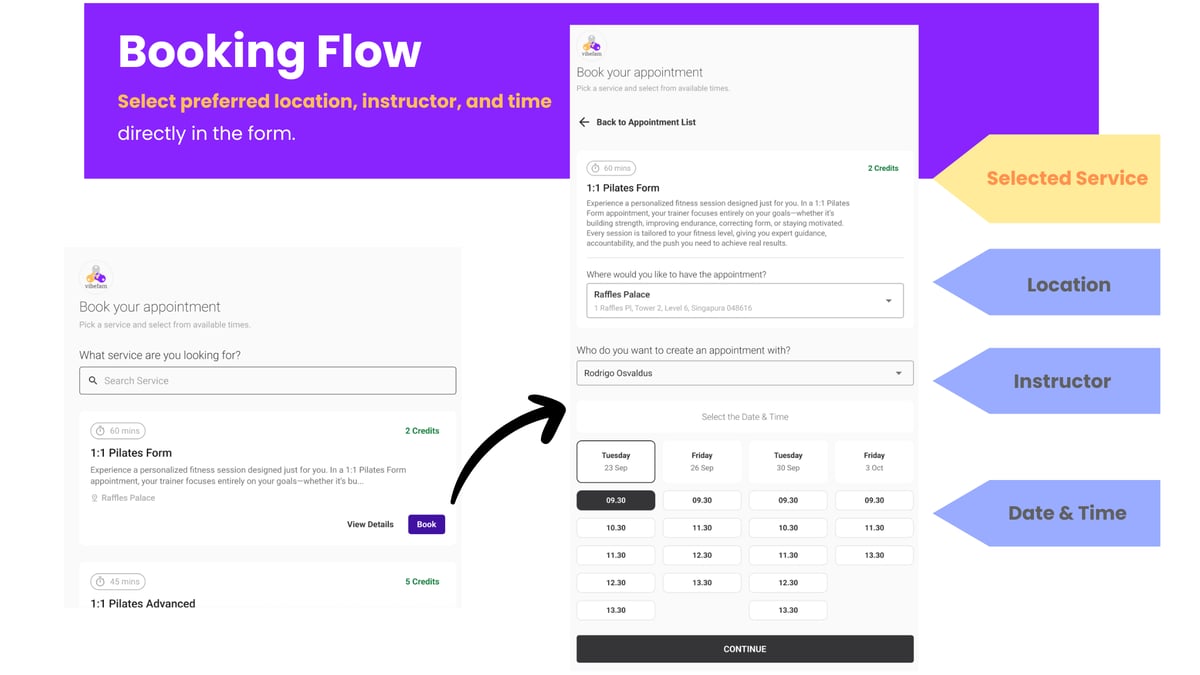
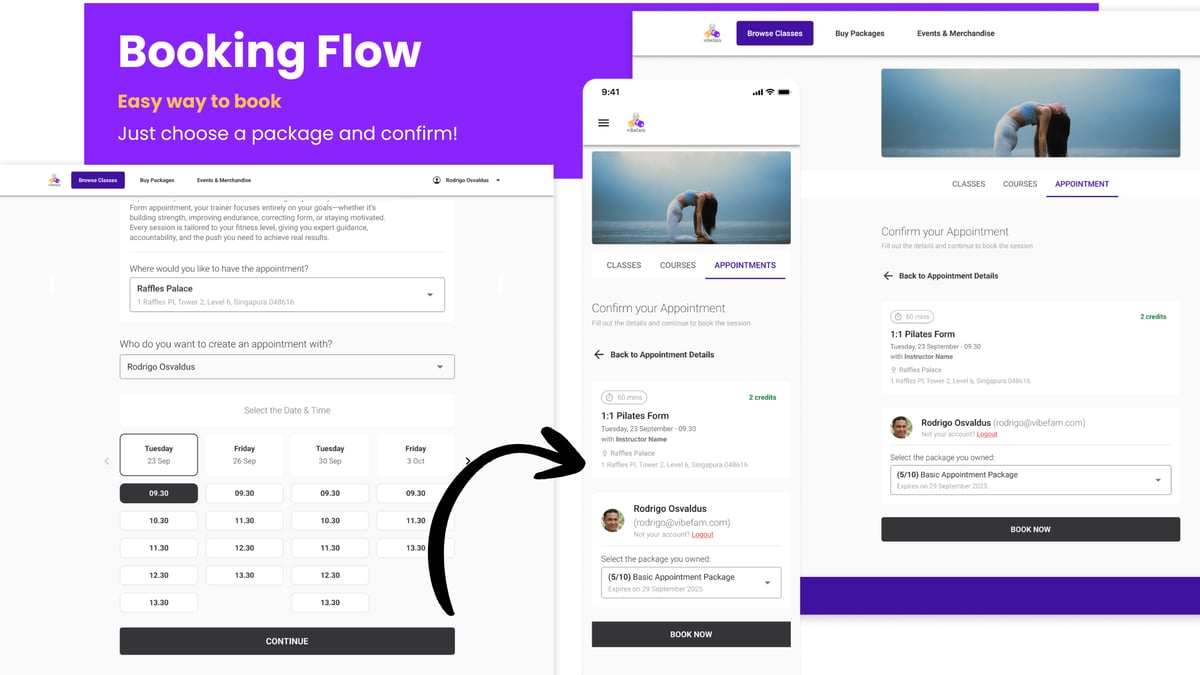
Step 3: Book and confirm using a package — all in just a few taps!
Step 4: Confirmed Appointment Bookings
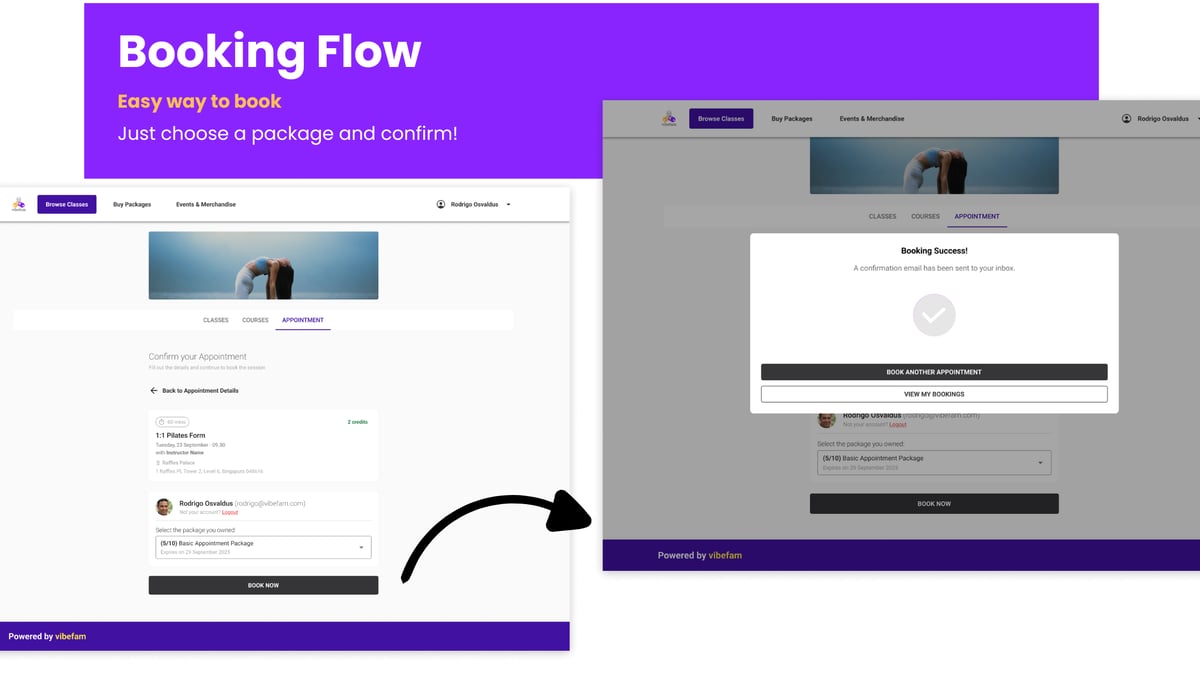 No hassle, no back-and-forth — just smooth, direct booking.
⚙️ How to Set It Up
Setup has three parts: create the service, make sure a package can pay for it, and add availability to your schedule.
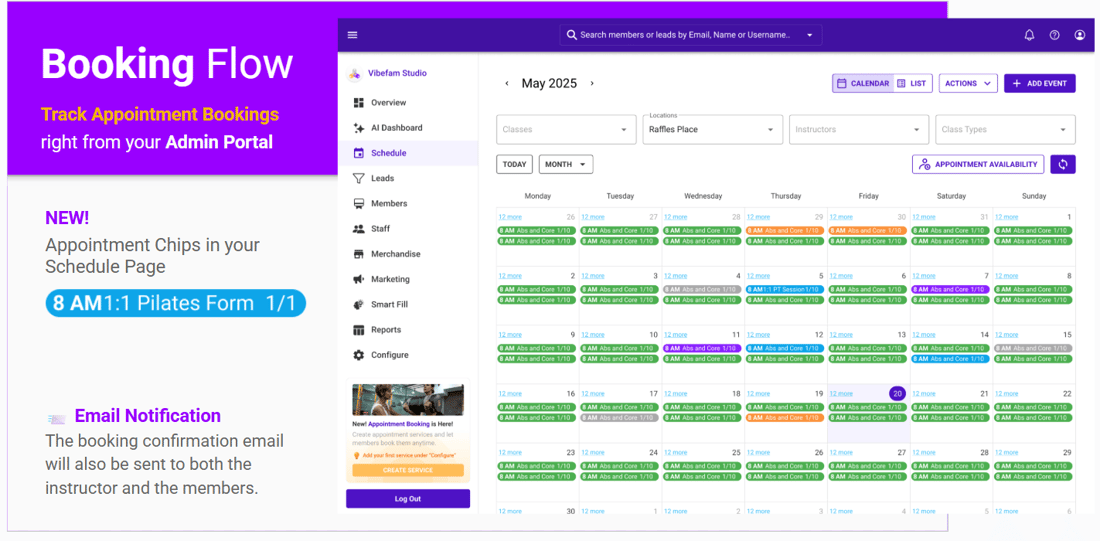
- Track all upcoming appointment bookings directly in your Admin Portal.
- View appointments easily on your schedule
- Receive automated email notifications for every new booking — sent to both the instructor and the member for confirmation.
Step 1: Create a service
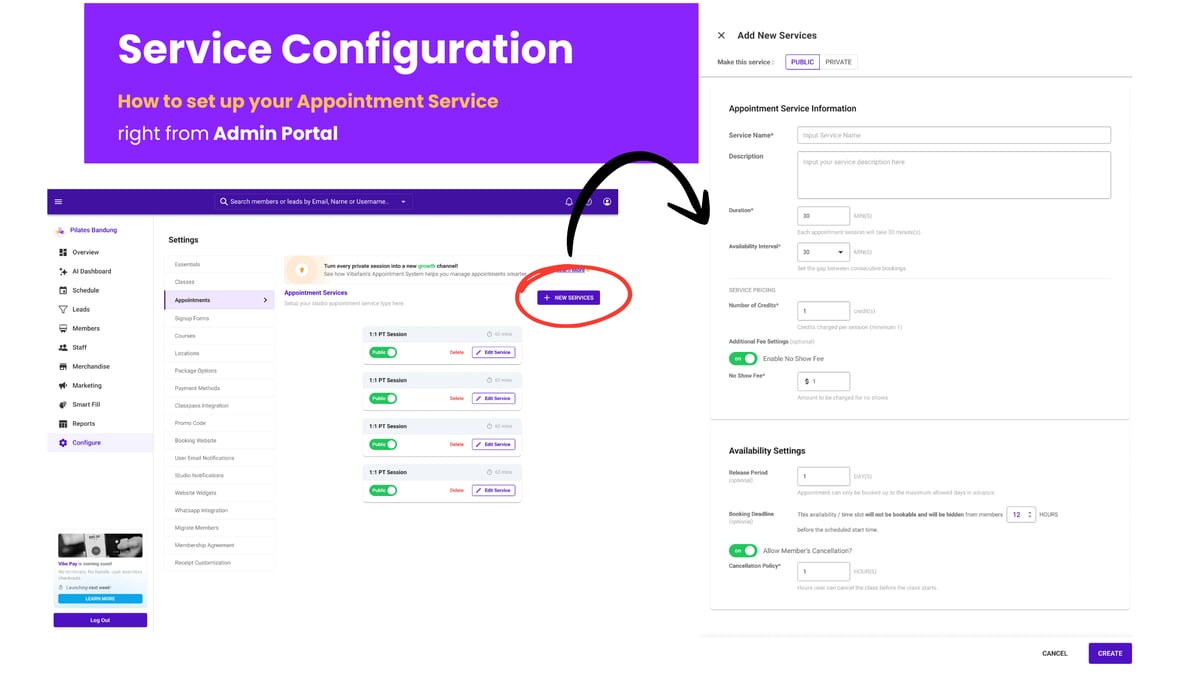 Go to Configure → Appointments → + New Services.
Visibility
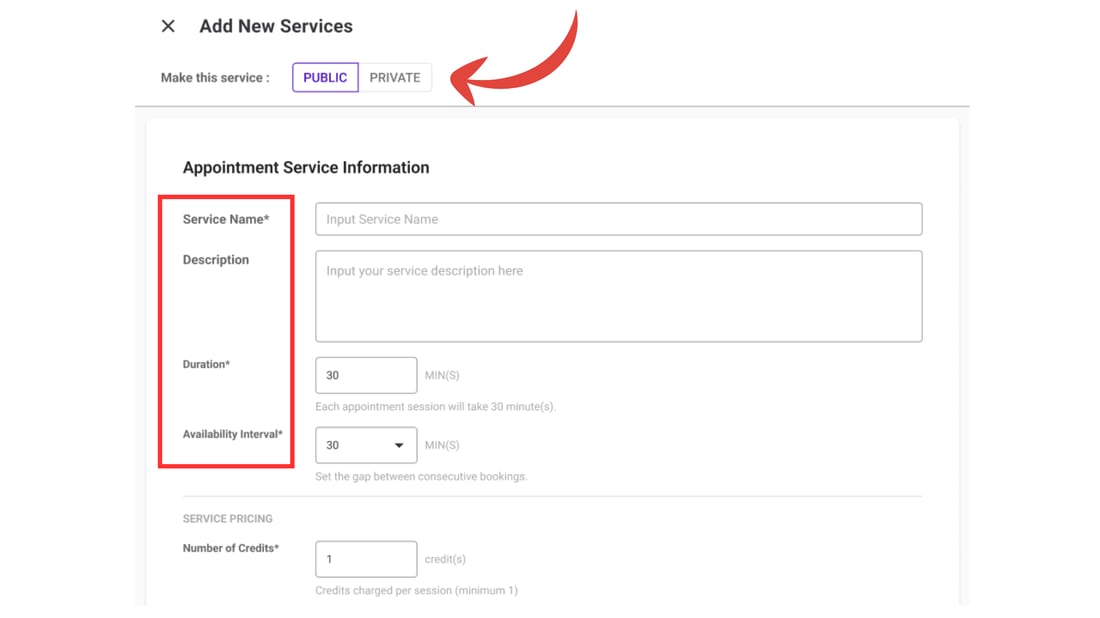
- Public — visible on your booking website and app
- Private — hidden from the front end (useful for services you only book manually, or offer to select members)
Service details
- Service Name — what members see (e.g. 60-min Personal Training)
- Description — a short explanation of the service
- Duration — how long each session lasts
- Availability Interval — the gap between bookable start times. This controls how tightly sessions can be packed:
- With a 30-min duration and a 15-min interval, members can start at 12:00, 12:15, 12:30, 12:45…
- With a 30-min interval, they can only start at 12:00, 12:30, 13:00…
- A shorter interval fills your schedule more densely; a longer one builds in breathing room between sessions.
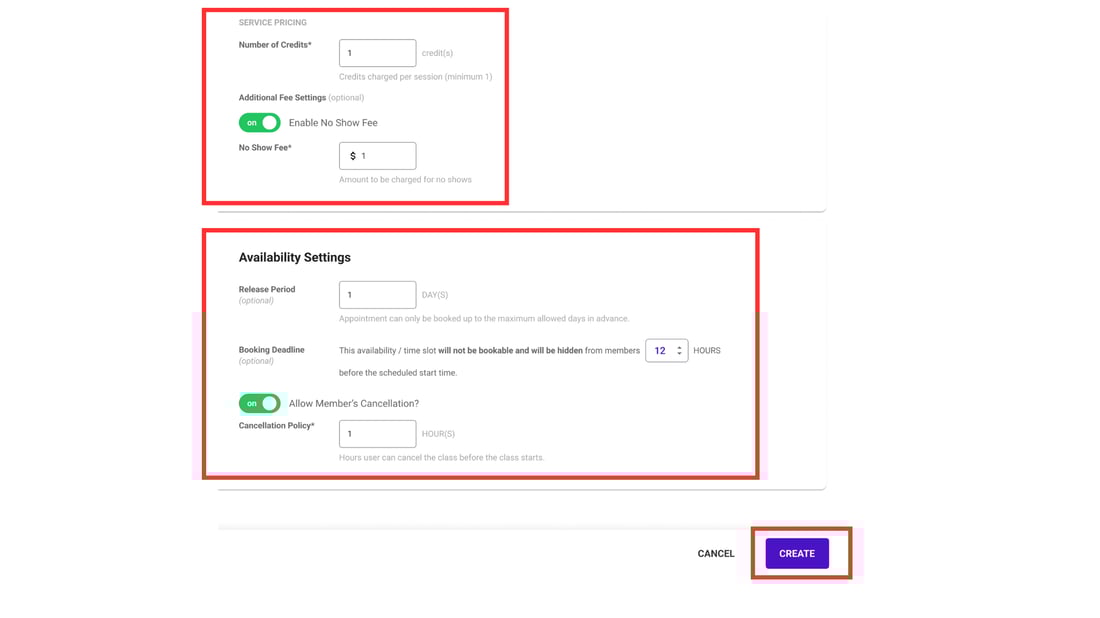 Credits and optional rules
- Number of Credits — how many credits each appointment costs from a member's package.
- Additional Fee (optional) — a no-show fee. If attendance isn't marked, the system flags it the next day and warns that a no-show fee applies. If it isn't rectified (or the member forgiven) by day's end, their saved card is charged this amount automatically.
- Release Period (optional) — members can only book up to X days ahead. Useful for keeping bookings within a window you can actually commit to.
- Booking Deadline (optional) — the latest a member can book before the session, so instructors don't get last-minute bookings.
- Allow Member's Cancellation? — sets how long before the session a member is allowed to cancel.
Click Create when done.
Step 2: Make packages eligible
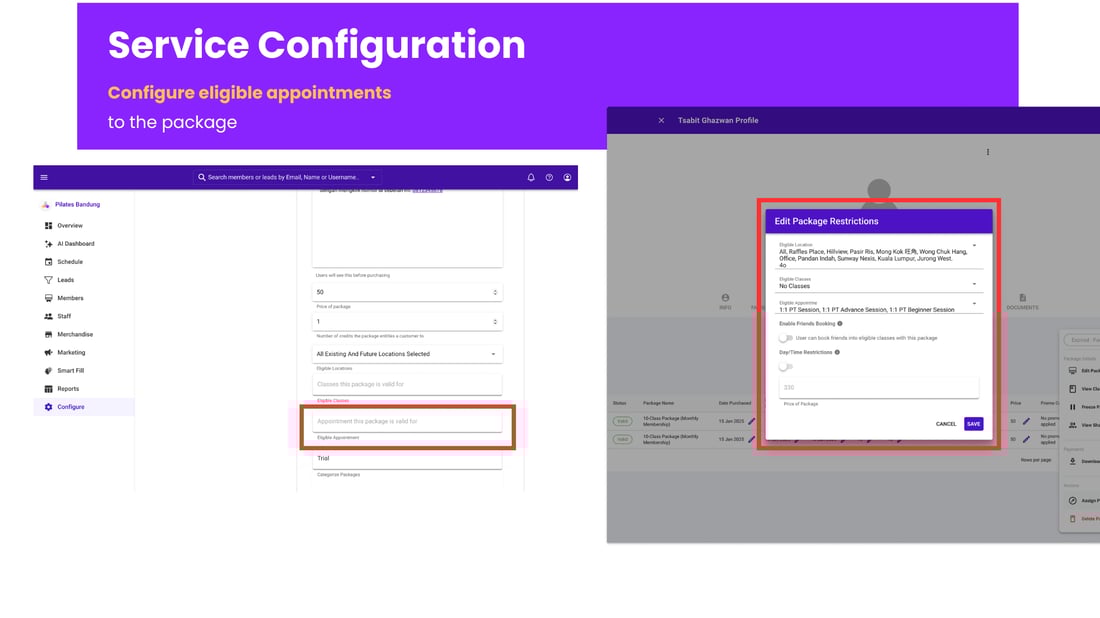 An appointment can only be booked with a package that's allowed to pay for it. Go to Configure → Package Options and select the package that should cover this appointment.
You can do this in two ways:
- On the package — add the appointment to the package's eligibility, so everyone with that package can book it, or
- On an individual member — add it to a specific member's existing package.
Step 3: Add appointments to the schedule
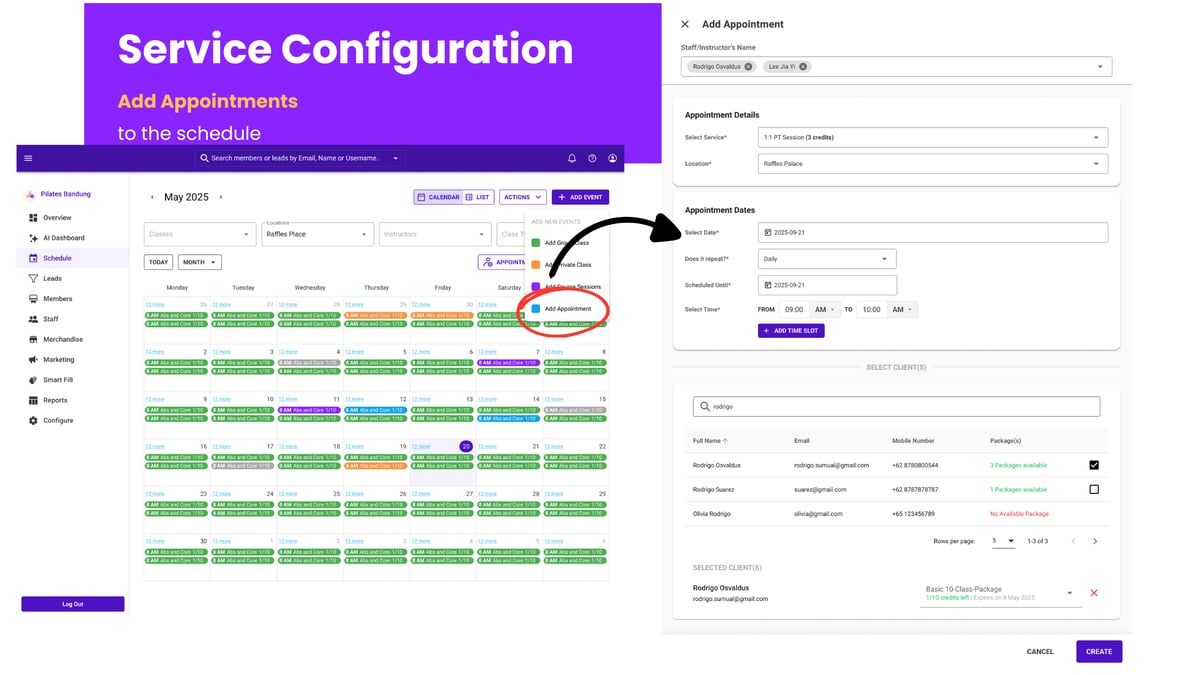 Creating the service defines what the appointment is; adding it to the schedule defines when it's available and who runs it.
- Go to Schedule → Add Events → Add Appointment.
- Set the details:
- Staff / Instructor — who runs this appointment slot
- Select Service — the service you created in Step 1
- Location — where it's held
- Set the dates:
- Select Date — the appointment date
- Does it Repeat? — for recurring availability, set the pattern
- Schedule Until — the end date for a repeating appointment (same as classes and courses)
- Select Time — the session time
- Optionally, add the member and their eligible package directly.
- Click Create.
Your appointment is now live and bookable.
Viewing appointment availability
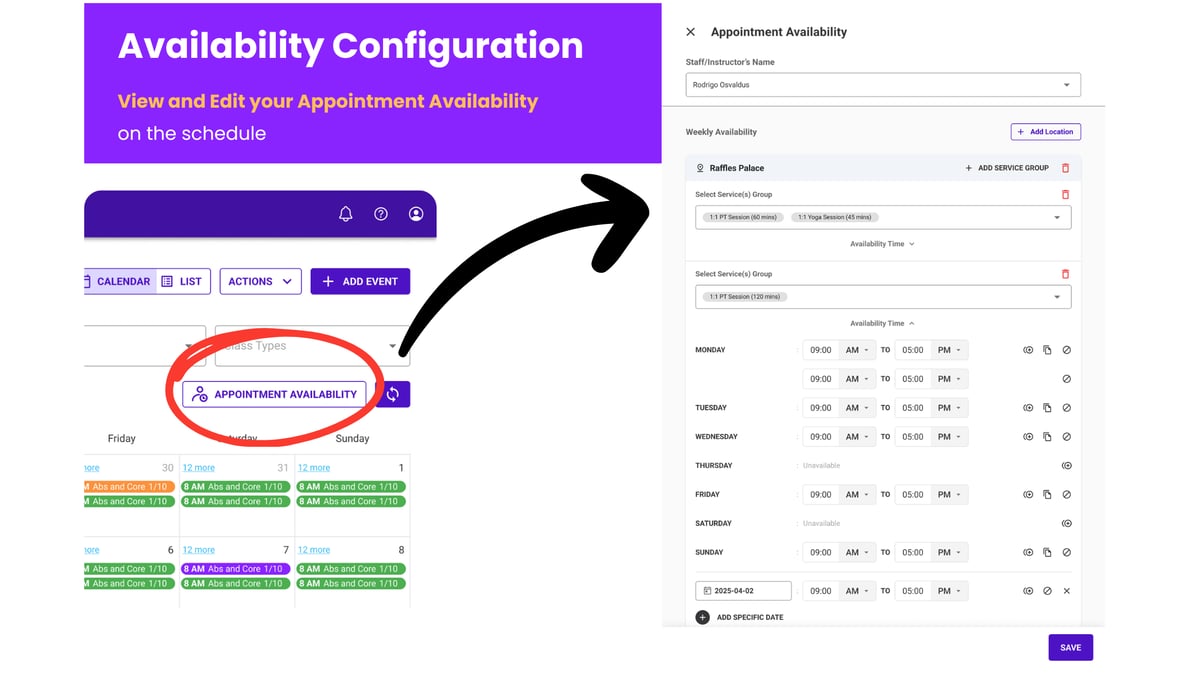 Go to Schedule → Appointment Availability.
Here you can see each instructor's schedule and open availability, and add or remove appointment slots by location. It's the quickest way to see where you have capacity and where a trainer is fully booked.
Showing appointments on your booking site
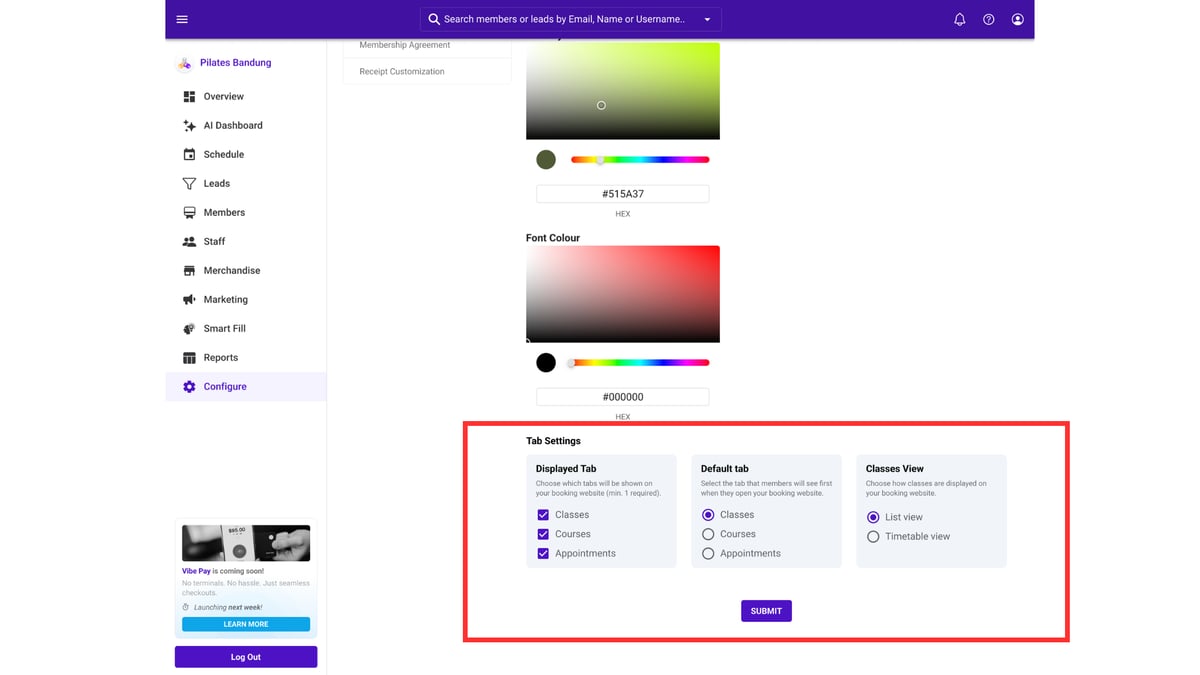 Control how appointments appear to members under Configure → Booking Website:
- Display tab — choose whether Classes, Courses, and Appointments each appear
- Default tab — set which one members land on first
- View — show your schedule as a List or Timetable
See Setting up your booking website for the full walkthrough.
Which studios is this for?
Appointments suit any studio offering individual sessions alongside — or instead of — group classes:
- Personal training and private coaching
- Massage and wellness
- Chiropractic and physiotherapy
- Beauty and aesthetics
- Consultations of any kind
Before you go live
- Book a test appointment yourself, end to end, on your booking website
- Confirm the confirmation emails reach both instructor and member
- Check your package is eligible, or members won't be able to pay with it
- Make sure your payment integration is set up if you're charging no-show fees