
Vibefam lets you create and send marketing emails to your members directly — promotions, announcements, re-engagement campaigns — design them with a drag-and-drop editor, save designs as reusable templates, and track how each campaign performed.
Navigate to Marketing.
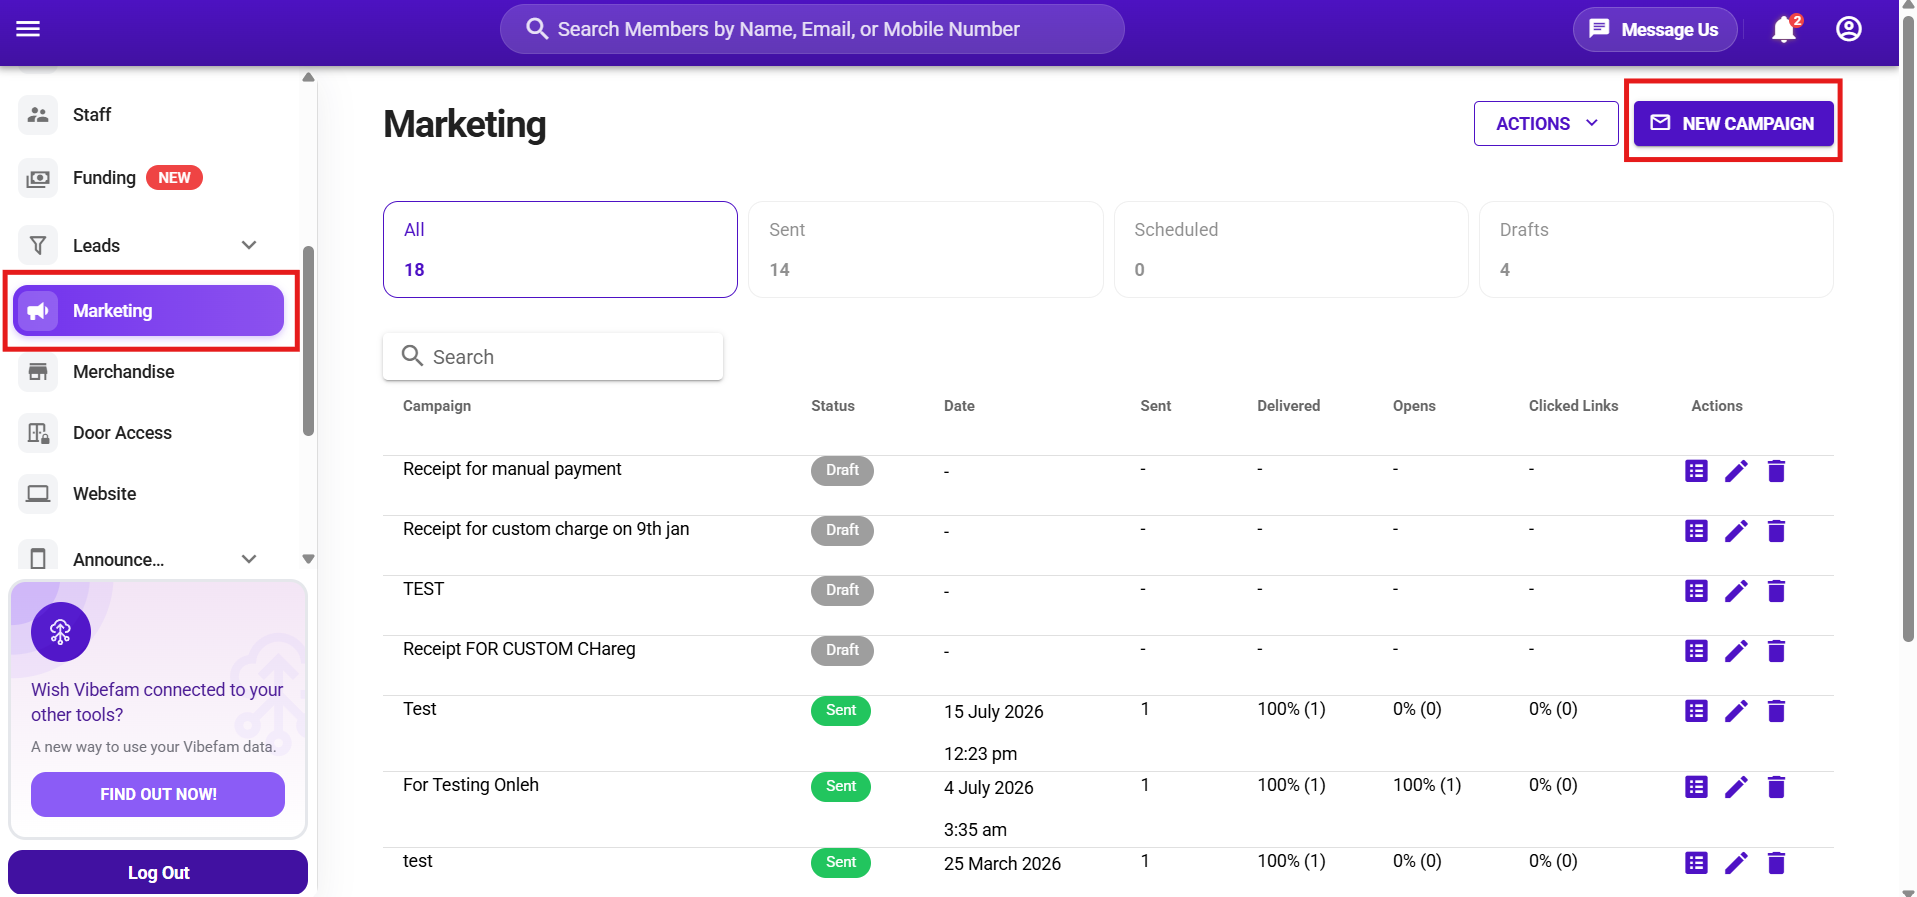
The Marketing dashboard
The Marketing page lists all your campaigns. Along the top, cards summarise them by status — All, Sent, and Scheduled — so you can see at a glance what's gone out and what's queued.
Each campaign row shows its performance once sent:
| Column | What it tells you |
|---|---|
| Status | Draft, Scheduled, or Sent |
| Date | When it was (or will be) sent |
| Sent | How many recipients it went to |
| Delivered | How many were successfully delivered |
| Opens | How many recipients opened it |
| Clicked Links | How many clicked a link inside |
Use the Actions icons on each row to view, edit, or delete a campaign. Opens and Clicked Links are how you tell what's working — a low open rate usually points to the subject line, while low clicks point to the content or offer.
Draft campaigns stay in the list until you send or delete them, so it's normal to see a mix of Drafts and Sent campaigns here.
Creating a campaign
Step 1: Start a new campaign
Click New Campaign in the top right.
Step 2: Design your email
Campaigns are built in the Email Editor — a drag-and-drop tool. Drag content blocks from the right-hand panel onto your email:
- Columns, Button, Divider, Heading, Paragraph, Image, Menu, and HTML for custom code
- Adjust fonts, colours, and styles per block from the block settings
- Preview your design, and switch between desktop and mobile views, using the controls at the bottom of the canvas
Across the top of the editor you have four actions:
- Manage Email Template — save this design as a reusable template, or load a saved one
- Draft Email — save the campaign as a draft to finish later
- Schedule Email — set it to send automatically at a future date and time
- Send Email — send it now, which opens the recipient-selection flow below
Step 3: Choose your recipients
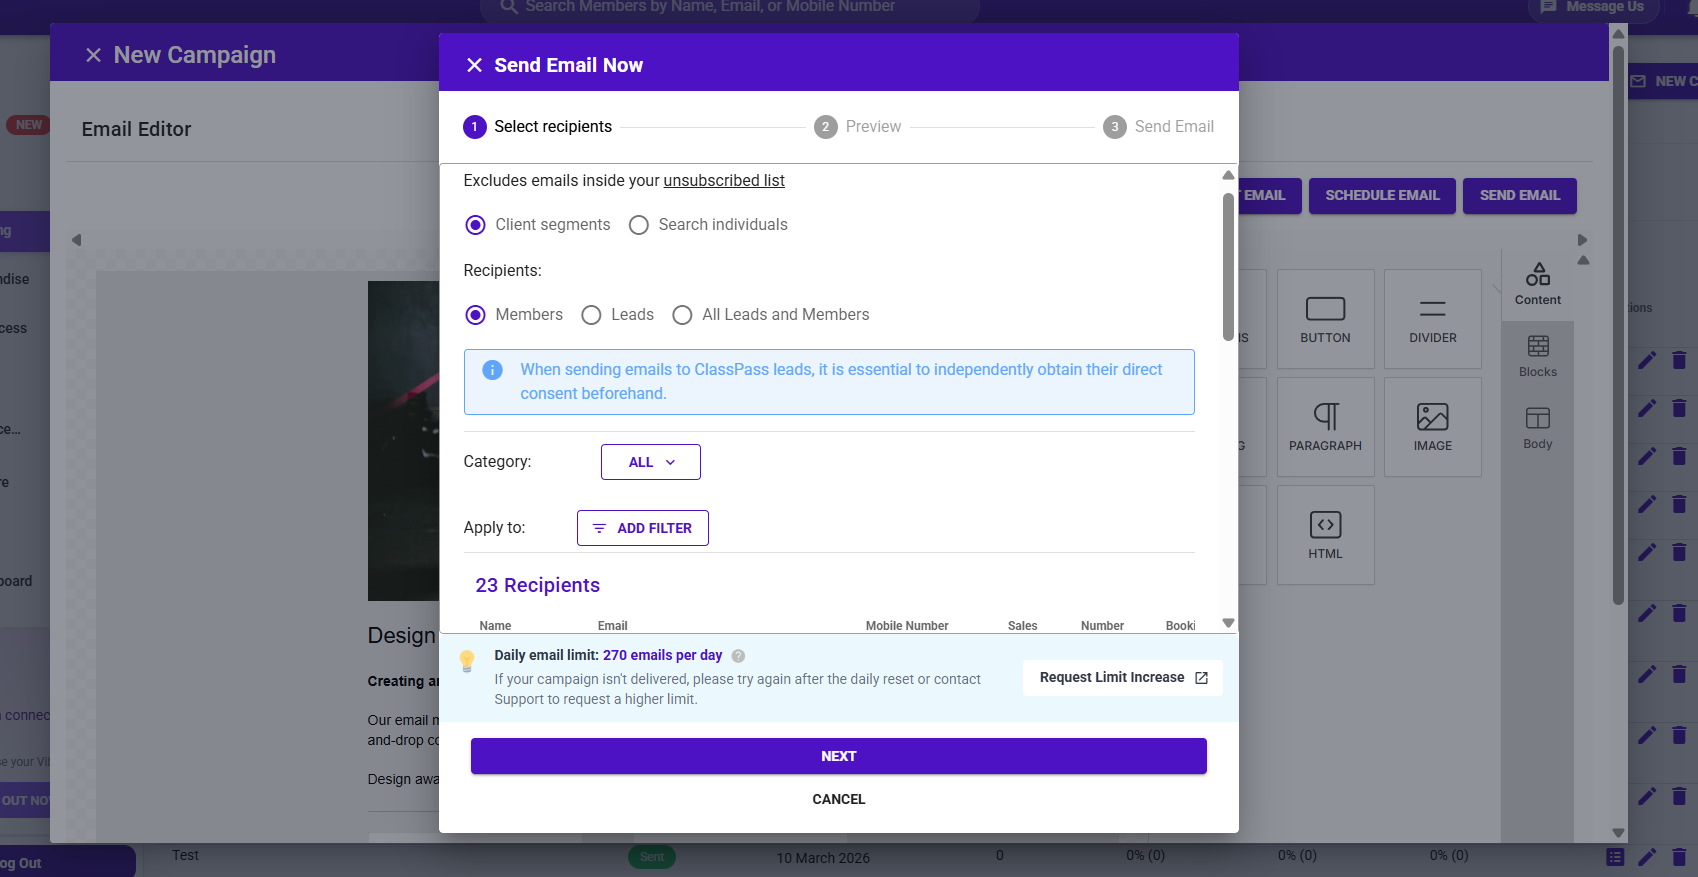
When you send (or schedule), a three-step flow opens: Select recipients → Preview → Send.
Who to send to
Pick a recipient type:
- Members
- Leads
- All Leads and Members
Filter to a segment
You can send to everyone in that group, or narrow down:
- Category — quick segments such as All, Active, Inactive, and Expired (customers whose packages have expired).
- Add Filter — build a precise condition, then click Apply. Filters can target behaviour and status over a time window, for example:
- Bookings is equal to 0 in the last 14 days — to re-engage members who've gone quiet
- Members whose status is Expired in the last 7 days — to win back recent lapses
As you adjust the category and filters, the recipient count and preview list update live, so you always see exactly who will receive the email before sending.
Unsubscribes are handled for you. The send automatically excludes anyone on your unsubscribed list, so you don't need to manage opt-outs manually.
Click Next when your audience is right.
Step 4: Preview
Review the email as recipients will see it, then continue.
Step 5: Send
Send the campaign — or, from the editor, use Schedule Email to have it go out at a set time instead.
Daily email limit
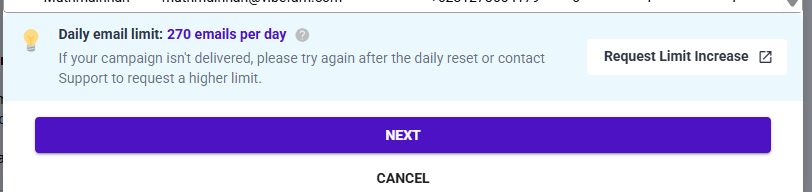
There's a daily send limit on marketing emails (for example, 270 emails per day on the account shown in-app — yours may differ). If a campaign to a large list isn't fully delivered, it may have hit the daily cap.
- Try again after the daily reset, or
- Use the Request Limit Increase link in the send flow to ask Support for a higher limit.
If you're planning a large send, it's worth checking your limit against your list size ahead of time.
Reusing designs with templates
If you send similar emails regularly — a monthly newsletter, recurring promotions — save the design as a template with Manage Email Template while building. Next time, load the saved template instead of designing from scratch.
You can also reach your saved templates from the Marketing page: click Actions → Email Templates.
Before you send
- Send yourself a test and read it as a member would, on mobile as well as desktop (the editor's mobile preview helps, but a real inbox is the true check)
- Double-check the recipient filter — Active vs. Inactive vs. All — before launching, since a campaign can't be unsent
- Make sure the offer or message matches the audience you've selected
- After sending, check Opens and Clicked Links on the dashboard to learn what resonates
- Keep marketing sends purposeful; frequent, untargeted emails lead to members tuning out or unsubscribing