
Categories group your packages into sections on your booking website, and the order you arrange them in is the order your members see. Together they control how your pricing page reads — which is often the difference between a member finding the right package and giving up.
Navigate to Configure → Package Options, then choose the One Time Packages or Recurring Packages tab.
What categories do
Each category appears on your booking website as a headed section, with its packages listed underneath. A category has two parts:
- Category name — the section heading, e.g. Registration, Membership Package
- Category description — a short line under the heading explaining who the section is for, e.g. Registration for 1st time member only
The description is the useful part. It lets you answer a member's question before they have to ask it — who a package is for, what they need to buy first, or what the difference is between two similar sections.
Common ways studios use categories
| Category setup | Why it works |
|---|---|
| Registration / Intro Offers / Regular Packages | Steers first-time visitors to the trial rather than the 10-class pack, and makes the joining fee unmissable. |
| By class type — e.g. Reformer, Mat, Barre | Essential if packages are restricted by class type. Stops members buying credits they can't redeem. |
| By location | Useful for multi-venue studios where packages aren't valid across all locations. |
| By commitment — e.g. Monthly Memberships, Class Packs, Drop-In | Lets members self-select by how often they plan to attend, rather than by price alone. |
| Corporate / Student / Private | Pair a category with the package-level Private toggle to keep special rates off the public page. |
Keep the number of categories low. Three to five sections is usually enough — beyond that, members scroll past what you most want them to buy.
Creating a category
- Go to Configure → Package Options.
- Click Manage Categories.
- Add a new category and enter the category name — this becomes the section heading on your booking website.
- Add a category description if you want a line of explanatory text under the heading. Optional, but recommended.
- Save your changes.
- Assign packages to the category. You can do this from the package form itself — open the package, and use the Select Category field.
A package can only sit in one category at a time. If you can't find a package on your booking website, check whether it's been assigned to a category that isn't published yet.
Editing an existing category
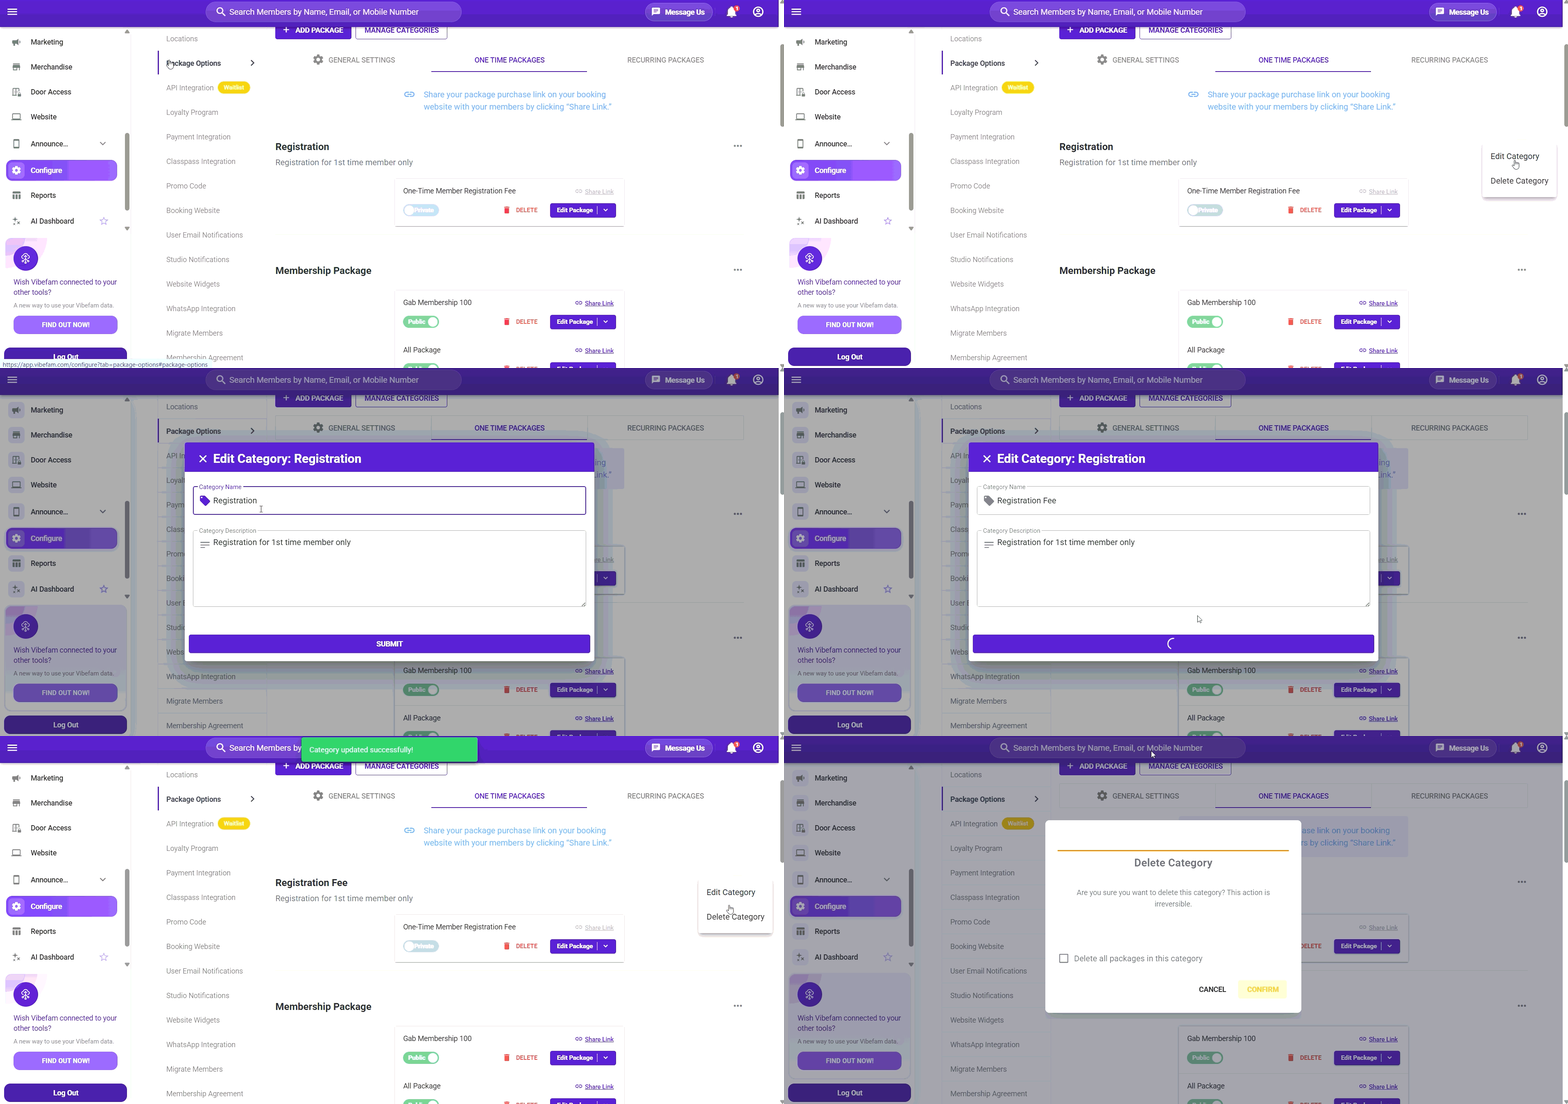
- Go to Configure → Package Options.
- Click Manage Categories, or use the ⋯ menu to the right of the category heading in the package list.
- Update the name or description.
- Save your changes.
Renaming a category doesn't affect the packages inside it or any memberships already purchased — it only changes the heading your members see.
Before deleting a category, move its packages elsewhere first. Packages left without a category may not display on your booking website.
Arranging the package sequence
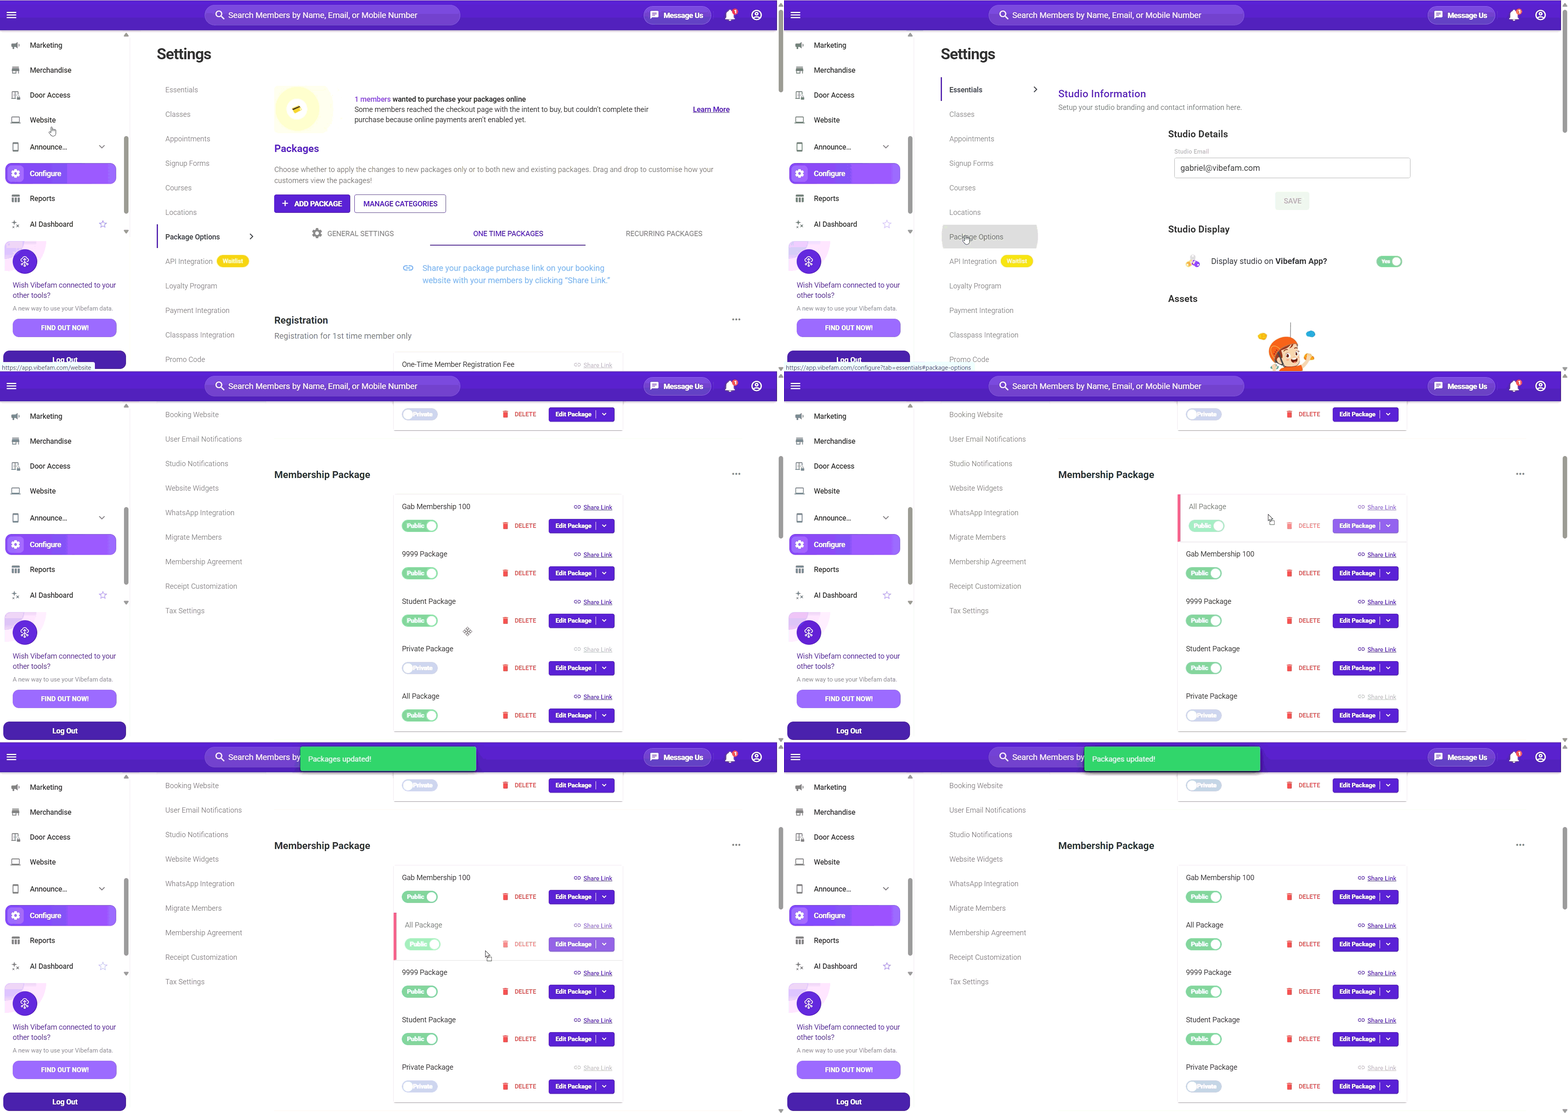
The order on this page is the order your members see. Drag and drop to rearrange:
- Categories — drag a category to move the whole section, and everything in it, up or down
- Packages — drag a package card to reorder it within its category
Changes save automatically as you drop. Refresh your booking website to confirm the new order.
How to order for conversions
- Put the package you most want new members to buy first. Most visitors don't scroll to the bottom.
- Keep registration or joining fees near the top if they're mandatory, so members don't reach checkout and get surprised.
- Order packages from smallest to largest commitment within a category, so the entry point is the first thing read.
- Move seasonal or promotional packages to the top while they're running, and back down once they end.